These days, many monitors are designed with built-in speakers. These are best to save money, extra desk space, and setting time. However, often, the monitor’s speaker doesn’t work because of inaccurately configured settings or cable connection.
Are you also facing something like that? Is your monitor speaker not working properly? Are you looking for a proper guide to learn how to enable monitor speakers? Well, in this guide we’ll share everything related to it. The process of enabling monitor speakers is almost the same as enabling standalone speakers.
The only difference is the type of connection. Typically, when you use HDMI or DisplayPort to connect the computer to the monitor, you won’t need a separate audio cable. But, DVI or VGA connections will require a separate 3.5 mm audio cable. To know the steps in detail, let’s dive into the guide.
How Do Monitor Speakers Work?
Monitor speakers are able to offer a flat frequency response to reproduce audio signals reliably within these budget constraints.
Generally, monitors are purposely designed by avoiding artificial boosting of bass, treble, or other frequencies to enhance the sound of the speaker and avoid cabinet’s and speaker’s resonance.
Most monitor speakers come with in-built amplification, so they are called active monitors. This means that they will connect directly to your sound card (using the appropriate adapter) or audio interface. Others, however, are ‘passive’ and must be amplified externally.
As a producer, you should be able to hear what you are mixing accurately without the speaker adding its own color to it. Suppose your speakers aren’t able to reproduce bass well, and here you will need to compensate by adding bass to the mix using an EQ. However, this mix will sound too bassy on a good system.
Why Does My Monitor Have No Sound?
There are several reasons why your monitor speaker is not working. For example, connection issues, inaccurate sound settings, maybe the devices are disabled, etc.
In this case, check the monitor setting, computer, and connection. Then check if your computer is muted or the volume is down or not. For Windows/macOS, check the sound setting of the output device. If it is not muted and the volume is also all right, then you can check the pc/computer setting.
You must ensure that the audio cables are plugged into the PC/laptop’s AUDIO/LINE/HEADPHONE OUT ports and to the AUDIO/LINE IN of the monitor when connected via VGA cable.
On the other side, if your monitor is connected by HDMI cable, ensure the HDMI cable connection is secure. You can unplug or replug the HDMI cable or try to connect another premium HDMI-certified cable.
If you try the above methods, the sound of your monitor will start working. But, if it still doesn’t work, you can try connecting it to another computer for rechecking.
How To Enable Monitor Speakers?
Many people wonder, do monitors have speakers? Well, yes! In order to play music or any other audio file, a monitor comes with built-in speakers. Typical monitors have internal speakers that produce average sound, and you won’t need external sound devices. These speakers are cost-effective, compact, and easy to use.
However, sometimes, it may become unable to carry audio signals. In this case, you can do the following-
Step 1: Connecting Computer to The Monitor
At the first step, you should connect your computer to your monitor. When connecting your computer and monitor, choose an HDMI or DisplayPort cable, if they support it, or DVI or VGA if they don’t.
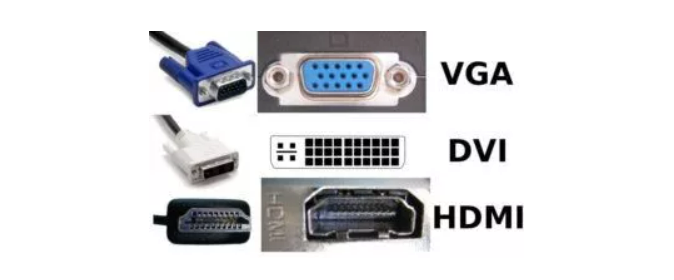
Remember, VGA is an analog signal that is less reliable than HDMI, DisplayPort, and DVI’s high-quality digital signals. That’s why it should be your last resort.
In case your monitor does not support audio over HDMI and DisplayPort, you can use DVI or VGA and also connect a 3.5 mm audio cord. Make sure to label all the required ports on both your computer and monitor.
Step 2: Attaching the 3.5 mm Cable
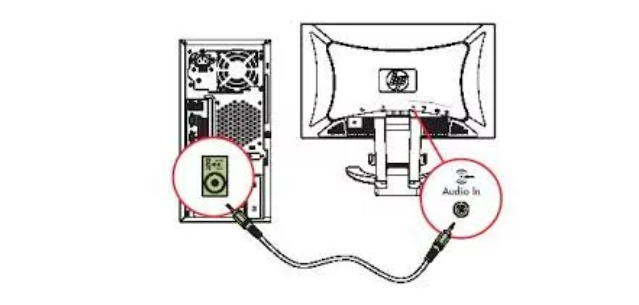
Attach the 3.5 mm cable’s end to your computer’s audio output port. On most desktops and laptops, this port is found on the back or front side in either green or black and is denoted by a headphones icon. Once that is done, connect the other end of the 3.5 mm cable to your monitor’s audio input port, which is standard for headphones.
Step 3: Turn the Computer On and Set the Screen Resolution
Turn on your computer and monitor by connecting them to the power supply. And then, your computer will display the video signal automatically on the monitor.
After that, sign in > right-click your desktop > select “Screen Resolution,” and make changes to the screen resolution from the recommended setting.
Step 4: Select the Monitor
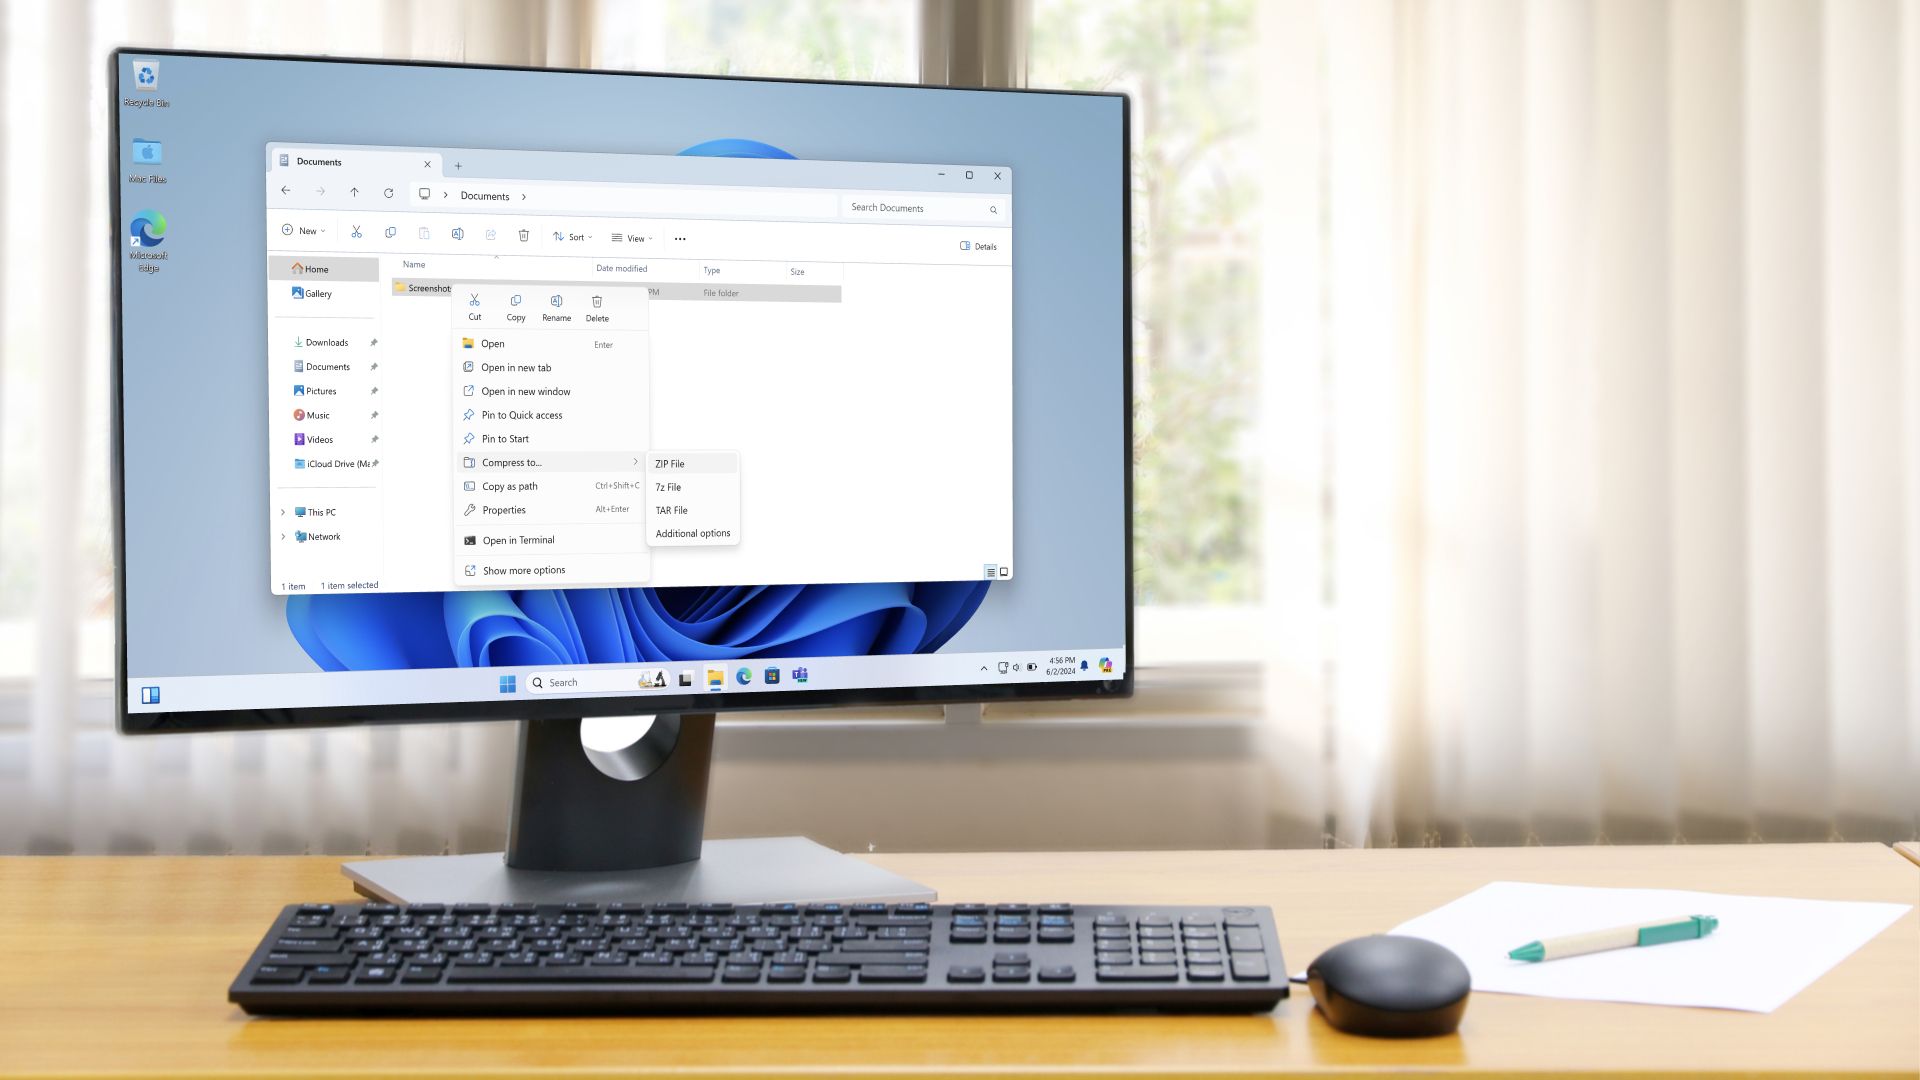
The next step is to click the audio icon from the Windows Taskbar’s System Tray area. So, right-click the audio icon, and from there choose “Playback Devices”.
Depending on what type of cable is connected to, you need to do the following.
- If connected via HDMI or DisplayPort, click your monitor’s name in the device list.
- Then, click on “Speakers” if your monitor is connected via 3.5 mm audio and DVI or VGA,
Step 5: Enable Your Monitor Speaker
Once you right-click the monitor name or speaker item, notice if the list of devices is gray, select “Enable” if it is. Then, to enable your monitor speakers as your computer’s default speaker, you should click the “Set Default” button.
Lastly, click the “Configure” button and then click “Test” to test if they are working or not. Restart your computer if requested, otherwise complete the process by closing the dialog box.
You may also see this video to enable your monitor speaker.
Final Verdict
As we have mentioned earlier, nowadays, most monitors come with built-in speakers. This way, you won’t require setting up external speakers to enjoy listening to audio and music.
So, if you’re wondering how to enable monitor speakers, we’ve discussed everything in this guide. Hopefully, you found what you were looking for from this guide. So, start enjoying music and audio using your monitor by enabling speakers. Good luck!