This device was the first one we tested, to reach 4.00 GHz in Prime95 torture testing. This will certainly help with extracting everything out of the GPU inside, but what is also very interesting, is the upgradability this notebook offers.
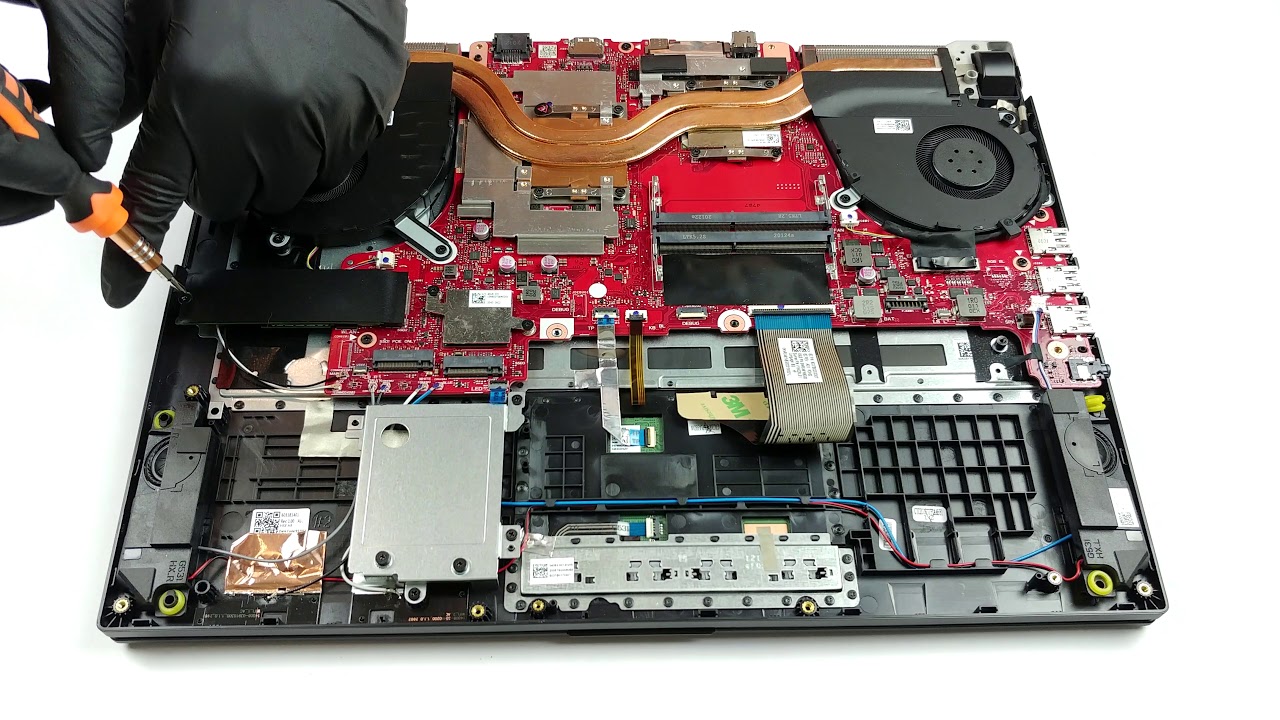
1. Remove the bottom plate
There are 11 Phillips-head screws that hold this notebook’s bottom plate in place. 10 of them can be removed, while one stays attached and lifts the panel upwards, so you can start the prying process from there. By the way, don’t forget the RGB strips, which are connected to the motherboard via two ribbon cables. So, lift gently, then unplug the connectors, and remove the bottom panel from the chassis.

2. Battery
First, there is the battery with its 48Wh capacity, which is definitely too small for that hardware, but it’s not something new in the gaming laptop world.
…
Read full post here:
https://laptopmedia.com/highlights/inside-asus-rog-strix-g15-g512-disassembly-and-upgrade-options/